Roofing & Envelope Systems
What Are Wood Nailers — and Why Do They Matter?
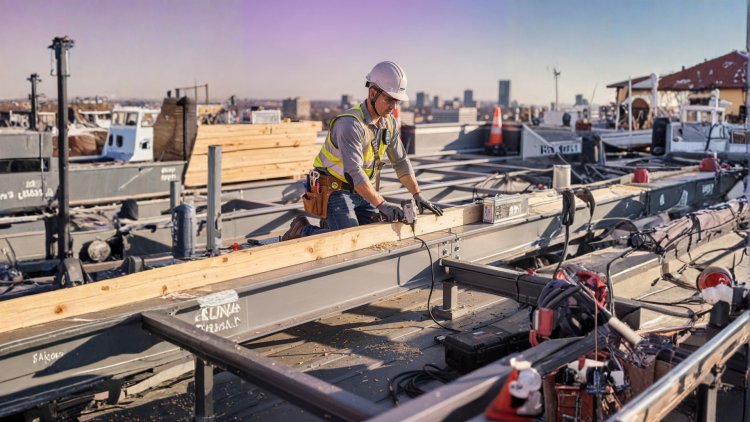
Wood nailers play a critical structural role in roofing and wall assemblies, providing the fastening substrate that keeps roofing membranes, edge metal, coping systems, and cladding securely anchored under long-term environmental stress.
Small Components With Major Structural Responsibility
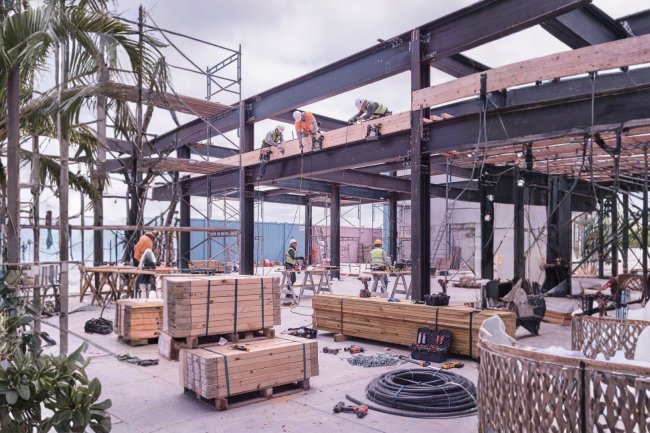
Wood nailers are typically pressure-treated lumber members anchored to structural decks or parapet walls. They serve as the fastening substrate for roofing systems, coping assemblies, flashing, edge metal, cladding, and exterior trim components.
Despite their modest appearance, nailers are responsible for resisting uplift pressures, thermal movement, lateral wind loads, and long-term environmental exposure. When a nailer fails — whether through pullout, rot, splitting, or movement — the connected roofing or façade system can quickly become vulnerable to water infiltration, blow-off events, and costly structural damage.
Why Nailers Fail
Inadequate fastener spacing or undersized attachment hardware
Use of untreated or low-grade lumber vulnerable to moisture exposure
Improper anchorage into the structural substrate or deck system
Critical Design Risks
Thermal expansion and contraction not properly accounted for
Moisture infiltration causing rot, swelling, and long-term decay
Missing or undersized hold-down clips reducing uplift resistance
Wood Nailer Material Standards
Selecting the Right Wood Nailer Material
Material selection is the first line of defense against premature nailer failure. The performance of commercial roofing and wall assemblies depends heavily on choosing lumber that can withstand moisture exposure, fastening stresses, and long-term environmental loading.
Pressure-Treated Lumber
Always specify pressure-treated lumber rated for ground contact (UC4B) or above-ground exposure (UC3B), depending on project conditions and environmental exposure levels.
Proper treatment protects against moisture intrusion, insect activity, fungal growth, and long-term decay — the primary causes of premature wood nailer degradation in commercial roofing systems.
Species Selection
Dense, structurally stable species such as Southern Yellow Pine and Douglas Fir provide superior performance under fastening loads and long-term mechanical stress.
Avoid soft, knot-heavy, or inconsistent lumber grades that may split under bolt tension, lose fastener embedment strength, or experience dimensional instability over time.
Moisture Content
Specify lumber with a moisture content of 19% or less at the time of installation to maintain dimensional stability after placement.
Wet lumber that dries in place can shrink significantly, loosening fasteners, opening gaps beneath the nailer, and reducing the long-term performance of the roofing or wall assembly.
Anchorage & Structural Stability
Proper Anchorage: The Foundation of a Stable Nailer
Even the best lumber will fail if the anchorage system is poorly designed or improperly installed. Proper anchorage transfers uplift, lateral, and dynamic loading safely into the building structure — making it one of the most critical components of nailer performance.
Match Fasteners to the Substrate
Anchorage systems must be designed specifically for the substrate condition — whether concrete decks, steel roof decks, masonry parapets, or structural steel framing.
Powder-actuated fasteners, anchor bolts, and through-bolts each serve different structural applications. Using the wrong fastener type is one of the most common and costly field installation errors.
Follow Fastener Spacing Requirements
Fastener spacing must comply with manufacturer requirements and standards such as ANSI/SPRI ES-1 for edge metal assemblies.
Typical spacing ranges from 24 to 48 inches in field conditions, while perimeter and corner zones require tighter spacing due to significantly higher wind uplift pressures.
Account for Uplift Forces
Wind uplift is frequently the governing load condition for roof nailer systems. Design uplift pressures should be calculated using ASCE 7 load combinations based on project location and geometry.
Anchor embedment depth, edge distances, and fastening configurations must align with the structural engineer's specifications to ensure reliable long-term resistance.
Use Washers and Bearing Plates
Large-diameter washers and bearing plates distribute loads over a wider wood surface area, preventing fastener pull-through under high uplift conditions.
Although often overlooked in field installations, this simple detailing measure dramatically improves performance and durability during dynamic wind loading events.
Thermal Expansion & Moisture Movement
Managing Thermal Movement in Wood Nailer Systems
Wood expands and contracts as temperature and moisture levels fluctuate. On commercial rooftops, where environmental conditions can change rapidly, thermal movement must be carefully addressed to prevent stress buildup, fastener loosening, and premature system failure.
Why Thermal Movement Matters
Commercial roofing systems experience constant thermal cycling from sunlight exposure, seasonal changes, and moisture fluctuations. Wood nailers naturally expand and contract under these conditions, creating movement stresses that can affect fastener performance and attachment integrity.
Without proper detailing, thermal movement can cause buckling, splitting, fastener loosening, and progressive deterioration of roofing and edge metal systems. Effective movement management protects long-term system stability and reduces maintenance risk over the building lifecycle.
Key Strategies for Movement Control
1
Provide expansion gaps between nailer segments at regular intervals — typically every 8 to 10 feet — allowing movement without buckling or stress concentration.
2
Avoid rigid through-bolting at every anchor point along continuous nailer runs. Allow controlled slip at intermediate anchors to accommodate expansion and contraction.
3
Coordinate nailer movement with adjacent materials such as coping systems and edge metal to avoid prying forces caused by differential expansion behavior.
4
Specify stainless steel or hot-dipped galvanized fasteners to resist corrosion at the fastener-wood interface and maintain long-term anchorage reliability.
Field Installation Standards
Installation Best Practices Every Contractor Should Know
Even the best-designed wood nailer system can fail if installation quality is inconsistent. These field best practices help ensure proper anchorage performance, long-term durability, and reliable roofing system behavior throughout the building lifecycle.
01
Inspect the Substrate First
Before placing any nailer, confirm the receiving substrate is structurally sound, clean, and free from deterioration or moisture damage.
On reroofing projects, inspect existing decks and masonry carefully. Any compromised substrate conditions should be repaired or replaced before anchorage installation begins.
02
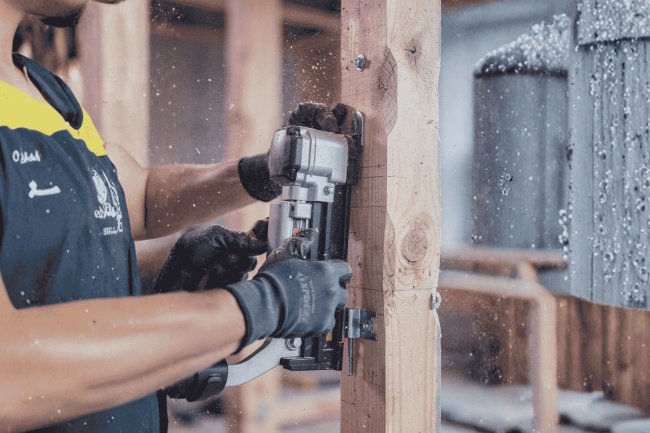
Pre-Drill to Avoid Splitting
Pre-drill wood nailers at all bolt locations to reduce splitting risk, particularly near lumber ends and corners where stress concentrations are highest.
Splitting around bolt holes significantly weakens load capacity and may remain hidden after the roofing assembly is installed above the nailer system.
03
Set Nailers Level and Plumb
Nailers that are twisted, uneven, or out of plane create poor bearing conditions for flashing systems, edge metal, and roofing terminations.
Use tapered plates or shims where necessary to maintain a true, level surface that supports proper drainage and long-term membrane performance.
04
Torque Fasteners to Specification
Over-torqued bolts can crush wood fibers and reduce holding strength, while under-torqued bolts allow premature movement and instability.
Use calibrated torque tools and follow the structural engineer's specifications to achieve consistent, reliable fastening performance across the installation.
05 • Final Quality Verification
Document and Inspect
Conduct a complete final inspection before the roofing membrane or flashing system is installed. Verify fastener spacing, bolt torque, nailer alignment, movement gaps, and substrate conditions.
Photograph the completed installation and archive documentation within the project record. This documentation becomes invaluable if future performance issues, warranty claims, or forensic investigations arise later in the building lifecycle.
BIM Coordination & Structural Detailing
How Detailing and BIM Integration Reduce Nailer Failures
Many nailer failures originate during design and coordination — not installation. BIM integration and precise detailing eliminate ambiguity, improve coordination, and reduce costly field conflicts before construction begins.
BIM Coordination
Clash Detection and Coordination
In a BIM environment, nailer systems can be modeled directly against structural framing, roof penetrations, drainage assemblies, and MEP systems inside a shared coordinated model.
This proactive coordination identifies conflicts early — such as nailers intersecting drainage paths or interfering with rooftop penetrations — before those issues create costly field modifications or delays.
Resolving conflicts digitally dramatically improves installation efficiency and reduces rework risk during construction.
Structural Detailing
Precise Connection Details
Fabrication-ready detailing clearly defines lumber dimensions, species, preservative treatment, fastener types, spacing requirements, and bolt torque values.
Precise documentation eliminates ambiguity during installation and prevents the substitution errors that commonly lead to anchorage failures or reduced uplift performance.
High-quality detailing remains one of the most cost-effective investments any project team can make in long-term nailer reliability.
Documentation Alignment
Specification Integration
Nailer requirements must remain fully coordinated across structural drawings, roofing specifications, edge metal submittals, and installation documentation.
When these documents are developed independently, coordination gaps emerge — leading to field improvisation, incorrect substitutions, and inconsistent installation practices.
Integrated BIM-driven documentation workflows eliminate these disconnects and create a more reliable, predictable construction process.
Failure Prevention Strategies
Common Mistakes to Avoid in Wood Nailer Systems
Most wood nailer failures are preventable. These recurring design and construction mistakes frequently appear in forensic investigations, warranty claims, and post-failure analyses across commercial roofing and cladding systems.
Design-Phase Errors
Documentation & Coordination Failures
Under-specified fasteners — Generic instructions like “nail to deck” without spacing, size, or embedment requirements leave critical installation decisions to the field crew.
Ignoring wind uplift zones — Failure to increase fastener density at corners and perimeter zones exposes the assembly to elevated ASCE 7 uplift pressures.
No expansion gap details — Continuous nailer runs without movement joints eventually buckle, split, or loosen as seasonal lumber movement accumulates stress.
Mismatched treatment levels — Using interior-grade lumber in exterior exposure conditions dramatically accelerates moisture-related decay and structural degradation.
Construction-Phase Errors
Installation & Material Failures
Material substitution — Replacing specified lumber with untreated or lower-grade alternatives without engineering approval commonly causes premature deterioration.
Skipping pre-drilling — Driving fasteners directly into nailer ends splits the lumber and significantly weakens uplift resistance performance.
Incorrect fastener type — Using smooth-shank nails instead of ring-shank fasteners or untreated steel in treated lumber assemblies leads to loosening and corrosion.
No final inspection — Covering nailers before documented inspection hides defects that often remain undiscovered until significant system failure occurs.
Long-Term Performance Protection
Maintenance and Periodic Inspection of Wood Nailers
Prevention does not end at project closeout. Wood nailers require periodic inspection and proactive maintenance to identify early warning signs before they evolve into major roofing or cladding failures.
1
Annual Visual Inspection
Walk the perimeter and inspect coping, flashing, and edge metal for separation, uplift, or moisture intrusion. These visible symptoms often indicate nailer movement or concealed decay beneath the assembly.
2
Post-Storm Assessment
After major wind events, inspect edge metal, membrane terminations, and exposed fasteners for uplift or displacement. Early detection of anchor distress prevents progressive system failure.
3
Probe Testing
Use an awl or probe to test accessible nailer surfaces for soft spots, moisture damage, or fungal decay — especially near flashing laps where trapped moisture accelerates deterioration.
4
Document and Track
Maintain records of inspections, photographs, repairs, and remediation work. Trend tracking helps teams predict deterioration patterns and budget maintenance proactively instead of reactively.
Long-Term Roofing Performance
Key Takeaways: Building a Nailer System That Lasts
Wood nailers may appear simple, but they carry critical responsibility in the long-term integrity of roofing and cladding systems. Reliable performance depends on disciplined detailing, engineered anchorage, coordinated installation, and ongoing maintenance.
01
Specify the Right Material
Always use pressure-treated lumber with the correct treatment retention level for the exposure condition. Verify moisture content before installation to minimize shrinkage and long-term fastener loosening.
02
Engineer the Anchorage
Design fastener type, spacing, embedment depth, and uplift resistance for actual wind loads. Increase fastening density at corners and perimeter zones per ASCE 7 requirements.
03
Plan for Movement
Provide expansion gaps and slip-anchor details while coordinating movement expectations with adjacent edge metal systems to prevent stress buildup and fastener pullout.
04
Detail and Document Thoroughly
Produce fabrication-ready details that clearly define all nailer requirements and integrate them across structural, roofing, and envelope specifications.
05
Inspect and Maintain
Perform annual inspections, post-storm assessments, and documented maintenance reviews to identify early deterioration before it escalates into costly roofing or cladding system failures.
Structural Integrity Starts with the Details
Wood nailers are one of the most overlooked yet structurally important components in a building envelope system. Getting them right — through engineered detailing, coordinated BIM workflows, disciplined installation, and proactive maintenance — is what separates long-term performance from premature failure. Partnering with experienced structural detailing and engineering teams ensures every connection is designed and documented to last.