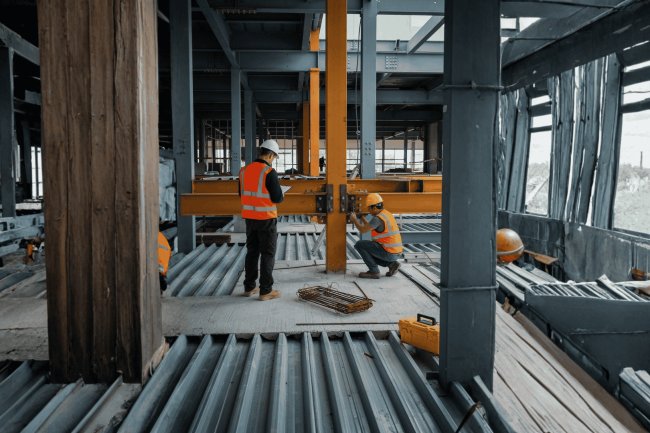
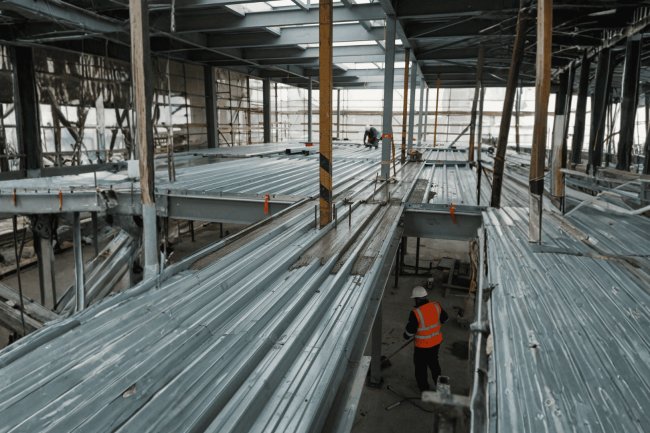
Roof Deck Sheet Placement Strategy for Faster Installation
On a commercial roof deck project, the difference between a smooth pour day and a costly shutdown often comes down to one thing: how your sheets hit the steel. Placement sequence, crew positioning, bundle staging, and lap orientation aren't afterthoughts — they're the core of a high-performance deck operation. This presentation breaks down field-tested strategies for roof deck sheet placement that cut labor hours, reduce waste, and keep your crew moving from bay to bay without backtracking or rework.
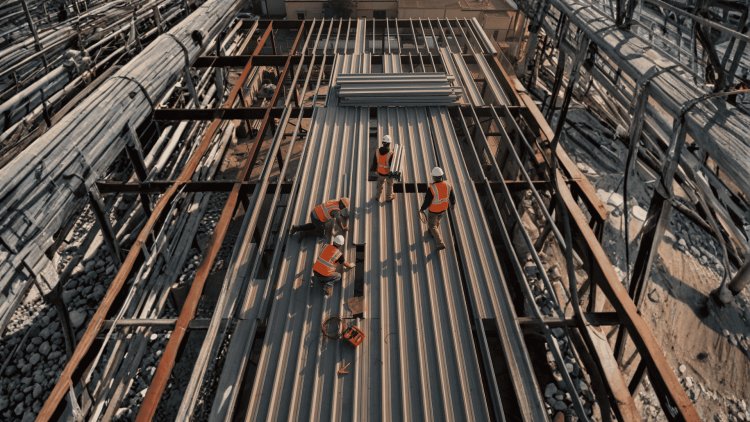
Why Placement Sequence Is the Job's Hidden Schedule Driver
Successful roof deck installations are rarely defined by material availability alone. The real determinant of productivity is placement sequence. A carefully planned sequence synchronizes crane operations, bundle staging, crew movement, and fastening activities into a continuous workflow. Without that coordination, crews spend valuable hours fighting congestion, repositioning materials, and correcting avoidable logistical problems that can quietly consume significant portions of the project schedule.
The Fastest Crew Is Usually The Most Organized Crew
Placement sequencing transforms roofing operations from a series of isolated tasks into a coordinated production system where materials, equipment, and labor move together efficiently.
Why Sequencing Impacts Schedule Performance
Access Blockages
Out-of-sequence sheets obstruct access to adjacent work zones.
Misplaced Bundles
Incorrect staging creates workflow interruptions and safety hazards.
Crew Congestion
Multiple crews collide in the same work area, reducing efficiency.
How Poor Sequencing Creates Delays
Placement Sequencing Best Practices
Establish a Fixed Start Point
Begin at the building corner farthest from the crane's primary swing path whenever site conditions allow.
Maintain One Direction
Move systematically across bays so finished work remains behind the installation crew.
Coordinate Bundle Drops
Position material immediately ahead of active operations instead of distributing bundles randomly.
Synchronize Fastening
Align fastening activities with material placement to prevent rehandling and unnecessary foot traffic.
The Ideal Placement Workflow
Installation Sequence Is Really Labor Management
Placement sequencing determines where crews walk, how materials move, when fasteners are installed, and how efficiently crane time is utilized. Because it influences nearly every field activity, sequencing often has a greater schedule impact than minor differences in manpower or equipment availability.
The Schedule Is Determined Long Before The First Sheet Is Placed
The most productive roof deck projects begin with a clearly defined placement strategy. By coordinating crane operations, material staging, crew movement, fastening activities, and bay-by-bay progression before installation starts, contractors create a continuous workflow that minimizes waste, reduces congestion, improves safety, and protects the overall project schedule. Placement sequence is not simply an installation preference. It is one of the most powerful schedule management tools available to the project team.
Lap orientation is one of the most consequential decisions made before installation begins—and one of the most commonly under-planned. The direction your side laps run relative to the deck's primary structural supports directly affects structural performance, weather-tightness during installation, and the ease with which fasteners can be set in the field. Reversing lap orientation mid-installation is expensive and time-consuming. Side lap direction, end lap placement, and lap consistency across bays are the three critical decisions that must be locked in before the first bundle is set.
Side laps should always overlap in the direction of prevailing weather during the installation window. This keeps rainwater from migrating under the top sheet during open-deck phases. In most North American markets, that means lapping left-to-right when facing into the prevailing wind.
End laps must land on structural supports—never in mid-span. A floating end lap lacks bearing, creates a point of flexural weakness, and will fail fastener pull-through under foot traffic or wind uplift loads. Always confirm framing spacing matches sheet end-lap requirements before the first bundle is set.
Mixed lap orientations across bays—often the result of sheets being placed by different crews without coordination—create diaphragm discontinuities and complicate engineering inspections. Establish lap direction as a standing crew briefing item at the start of every shift, not just day one.
Verify lap orientation requirements on structural drawings. Engineer-of-record approvals may override general best practices on specific projects. Note any special conditions or deviations from standard practice.
Review the deck manufacturer's installation guide for lap orientation requirements, minimum lap lengths, and fastener patterns. Manufacturer requirements may supersede general industry practices.
Obtain site-specific weather data for the installation window. Confirm prevailing wind direction and typical weather patterns. Do not rely on assumptions or regional generalizations—verify with actual meteorological data.
Confirm framing spacing matches sheet end-lap requirements. End laps must land on structural supports—never in mid-span. If spacing doesn't align, adjust sheet lengths, add supplemental framing, or revise deck layout before installation begins.
Review lap orientation requirements at the pre-installation meeting with all crews. Establish lap direction as a standing briefing item at the start of every shift. Ensure all crews understand the requirements and the consequences of non-compliance.
Using regional generalizations instead of site-specific weather data. Local topography, nearby structures, and seasonal variations can shift prevailing wind direction significantly.
End laps landing in mid-span instead of on structural supports. Creates flexural weakness and will fail fastener pull-through under foot traffic or wind uplift loads.
Different crews using different lap directions across bays. Creates diaphragm discontinuities, complicates engineering inspections, and reduces structural performance.
Failing to review deck manufacturer's installation guide. Manufacturer requirements may override general best practices and are required for warranty compliance.
Establishing lap direction on day one but not reinforcing it at every shift. Different crews or shift changes lead to inconsistent lap orientation across bays.
Reversing lap orientation mid-installation is expensive and time-consuming. Requires removing and reinstalling sheets, potentially damaging coatings and creating schedule delays.
Engineer-of-record approvals may override general best practices on specific projects.
Lap orientation is one of the most consequential decisions made before installation begins—and one of the most commonly under-planned. The direction your side laps run relative to the deck's primary structural supports directly affects structural performance, weather-tightness during installation, and the ease with which fasteners can be set in the field. Side laps should always overlap in the direction of prevailing weather during the installation window—this keeps rainwater from migrating under the top sheet during open-deck phases. In most North American markets, that means lapping left-to-right when facing into the prevailing wind, but always confirm with site-specific weather data, not assumptions. End laps must land on structural supports—never in mid-span. A floating end lap lacks bearing, creates a point of flexural weakness, and will fail fastener pull-through under foot traffic or wind uplift loads. Always confirm framing spacing matches sheet end-lap requirements before the first bundle is set. Mixed lap orientations across bays—often the result of sheets being placed by different crews without coordination—create diaphragm discontinuities and complicate engineering inspections. Establish lap direction as a standing crew briefing item at the start of every shift, not just day one. Reversing lap orientation mid-installation is expensive and time-consuming. Always verify lap orientation requirements against the structural drawings and the deck manufacturer's installation guide before the pre-installation meeting. Engineer-of-record approvals may override general best practices on specific projects. Get it right before the first piece lands.
Sheet Lap Orientation: Getting It Right Before the First Piece Lands
Side Lap Direction
• Overlap in direction of prevailing weather
• Prevents rainwater migration under top sheet
• Critical during open-deck installation phases
• Most North American markets: left-to-right when facing prevailing wind
• Confirm with site-specific weather data, not assumptionsEnd Lap Placement
• Must land on structural supports (joists, beams)
• Never in mid-span (floating end lap)
• Floating laps lack bearing
• Creates flexural weakness point
• Will fail fastener pull-through under loadLap Consistency Across Bays
• Consistent lap orientation across all bays
• Mixed orientations create diaphragm discontinuities
• Complicates engineering inspections
• Different crews must coordinate
• Standing crew briefing item every shiftLap Orientation Decision Framework
Common Lap Orientation Mistakes
Lap Orientation Impact on Structural Performance
Aspect
Correct Lap Orientation
Incorrect Lap Orientation
Weather-tightness during installation
Water sheds over laps, deck stays dry
Water migrates under laps, soaking deck and insulation
End lap bearing
End laps on structural supports, full bearing
Floating end laps in mid-span, no bearing, flexural weakness
Diaphragm continuity
Consistent lap orientation, continuous load path
Mixed orientations create discontinuities, reduced capacity
Fastener installation
Fasteners set easily in field, proper engagement
Difficult access, improper fastener angles, reduced pull-out capacity
Engineering inspection
Straightforward verification, clear load paths
Complicated inspections, unclear diaphragm capacity
Pre-Installation Verification Checklist
Always Verify Lap Orientation Requirements Against Structural Drawings and Manufacturer's Guide Before the Pre-Installation Meeting
The Lap Orientation Principle
Crane time is one of the most expensive line items on a steel deck project. Effective bundle staging transforms crane picks from reactive lifts into a choreographed sequence that keeps both crane and deck crew in constant productive motion.
Mark intended bundle landing zones on structural layout drawings before mobilization. Zones must be positioned on framing members strong enough to carry bundle loads — never on completed deck spans without confirmed capacity. Plan for one active zone and one staged zone per bay cluster to eliminate crane wait time.
Bundle delivery sequence should mirror sheet placement flow. If crews sweep east-to-west, picks should land progressively west. Coordinate with crane operators on a pick schedule each morning of major installation pushes — not on the fly.
Avoid overloading staging zones, especially on long-span joists. Excessive weight can cause deflection that throws deck sheets out of level before fastening. Know joist span and allowable construction load, and split bundles if needed. Confirm staging load limits with the erector’s engineer.
Establish clear hand signals or radio protocols between deck foreman and crane operator before work begins. Ambiguous signals cause dangerous load swings and wasted picks. Document the protocol at the pre-task safety meeting and enforce it consistently across shifts.
Bundle staging and crane coordination are not logistical afterthoughts — they are structural and economic drivers. Pre-planning zones, sequencing picks, managing loads, and enforcing clear communication protocols ensure uninterrupted flow and maximize crane productivity.
Bundle Staging & Uninterrupted Flow
01. Pre-Plan Landing Zones
02. Sequence Picks to Match Flow
03. Manage Bundle Weights
04. Signal Protocols
Key Insight
Sheet placement puts roof deck panels onto the structural frame, but fastening transforms those panels into a functioning structural diaphragm. Every fastener pattern is engineered to resist specific uplift, shear, and diaphragm forces. While field conditions frequently require installation adjustments, experienced crews understand that placement flexibility must never alter the engineer's fastening intent. Maintaining diaphragm performance depends on preserving the designed load path throughout the entire roof system.
Roof deck panels by themselves do not create diaphragm capacity. Load transfer occurs through support fasteners, sidelap connections, welds, screws, and attachments that connect the deck system into one engineered structural element.
Wind uplift and diaphragm demands vary significantly between field, edge, and corner regions. Uniform fastening ignores the engineer's load calculations and may compromise diaphragm performance, uplift resistance, and inspection approval.
Field adjustments are often necessary. However, every adjustment should preserve the original fastening density, load path, diaphragm continuity, and structural performance anticipated by the engineer.
Individual fastening deviations often appear insignificant in the field. However, diaphragm performance depends on thousands of connections working together as a system. Maintaining every engineered attachment is what preserves the building's intended lateral-force-resisting mechanism.
Fasteners do far more than hold deck sheets in place. They establish diaphragm capacity, transfer wind and seismic forces, resist uplift, and connect the entire roof system into a unified structural element. By following engineered zone-specific patterns, handling field adjustments correctly, documenting deviations through RFIs, and maintaining attachment continuity, crews protect both structural performance and project quality from installation through final inspection.
Fastening Patterns and Field Adjustments That Protect Diaphragm Integrity
Fasteners Create The Structural Load Path
How Diaphragm Forces Travel
Never Apply One Fastener Pattern Across The Entire Roof
Adjust Placement, Not Engineering Intent
Inspection & Pattern Verification
High-Risk Fastening Mistakes
Most Diaphragm Problems Begin With Small Shortcuts
The Fastening Pattern Is The Structure
Speed on a roof deck project isn't about rushing individual tasks—it's about eliminating the invisible waste between tasks. Every strategy in this presentation targets a specific source of field friction: poor sequencing, inconsistent lap orientation, disorganized staging, and fastening shortcuts. Address those friction points systematically and installation velocity takes care of itself. Sequence before you crane, lap orientation as a non-negotiable pre-task item, stage bundles like a moving pipeline, and protect the diaphragm by documenting every deviation.
Establish your sheet placement sequence—including crew sweep direction and bundle landing zones—before the first pick. A five-minute pre-installation planning session can eliminate hours of repositioning across a full installation day.
Confirm side lap and end lap direction against structural drawings at every crew briefing. A reversed lap discovered mid-bay costs two to three times more to correct than it would have cost to prevent. Brief it, mark it on the sheet stack, and verify it on the first three sheets of every new bay.
Bundle landing zones should always be one step ahead of active work—not scattered. Coordinate crane picks with placement flow so the crew never waits for material and the crane never waits for a clear zone. Confirm staging load limits against joist capacity before every major crane push.
Zone-specific fastening patterns are structural, not advisory. Apply field edge and corner patterns exactly as specified, and route every deviation through an RFI to the engineer of record before the next inspection cycle. A documented field fix is protection; an undocumented substitution is liability.
Which bay starts first? What direction does the crew sweep? Where do bundles land? Five minutes of planning eliminates hours of repositioning.
Confirm side lap and end lap direction against structural drawings. Mark direction on sheet stack. Verify on first three sheets of every new bay.
Where will bundles land today? One step ahead of active work. Confirm joist capacity for staging loads. Coordinate crane picks with placement flow.
Five minutes daily eliminates hours of repositioning. Compound savings across project duration.
No mid-bay lap corrections. Prevent 2–3x correction costs. Maintain diaphragm continuity.
Crew never waits for material. Crane never waits for clear zone. Pipeline staging maximizes daily output.
Apply fastening patterns exactly as specified. Route deviations through RFI. No inspection failures, no liability.
For more field-tested resources on steel deck installation, joist detailing, and structural deck performance, visit consac.com/blogs — a continuously updated library built for construction professionals in the structural steel space.
Best practices, sequencing strategies, lap orientation, staging, and fastening patterns.
Connection details, bearing requirements, bridging, and joist-to-deck coordination.
Diaphragm design, load tables, span capacity, and FM/UL compliance.
Address field friction points systematically and installation velocity takes care of itself.
Speed on a roof deck project isn't about rushing individual tasks—it's about eliminating the invisible waste between tasks. Every strategy targets a specific source of field friction: poor sequencing, inconsistent lap orientation, disorganized staging, and fastening shortcuts. Address those friction points systematically and installation velocity takes care of itself. Sequence before you crane: establish your sheet placement sequence—including crew sweep direction and bundle landing zones—before the first pick. A five-minute pre-installation planning session can eliminate hours of repositioning across a full installation day. Treat sequencing as a daily discipline, not a one-time setup. Lap orientation is a non-negotiable pre-task item: confirm side lap and end lap direction against structural drawings at every crew briefing. A reversed lap discovered mid-bay costs two to three times more to correct than it would have cost to prevent. Brief it, mark it on the sheet stack, and verify it on the first three sheets of every new bay. Stage bundles like a moving pipeline: bundle landing zones should always be one step ahead of active work—not scattered. Coordinate crane picks with placement flow so the crew never waits for material and the crane never waits for a clear zone. Confirm staging load limits against joist capacity before every major crane push. Protect the diaphragm—document every deviation: zone-specific fastening patterns are structural, not advisory. Apply field edge and corner patterns exactly as specified, and route every deviation through an RFI to the engineer of record before the next inspection cycle. A documented field fix is protection; an undocumented substitution is liability. For more field-tested resources on steel deck installation, joist detailing, and structural deck performance, visit consac.com/blogs.
Key Takeaways: Building a Faster, Tighter Deck Operation
Sequence Before You Crane
• Establish sheet placement sequence
• Define crew sweep direction
• Mark bundle landing zones
• Five-minute session eliminates hours of repositioning
• Treat sequencing as daily discipline, not one-time setupLap Orientation Is a Non-Negotiable Pre-Task Item
• Confirm side lap direction at every crew briefing
• Confirm end lap direction at every crew briefing
• Verify against structural drawings
• Mark lap direction on sheet stack
• Verify on first three sheets of every new bayStage Bundles Like a Moving Pipeline
• Landing zones one step ahead of active work
• Never scattered across deck
• Coordinate crane picks with placement flow
• Crew never waits for material
• Crane never waits for clear zone
• Confirm staging load limits against joist capacityProtect the Diaphragm — Document Every Deviation
• Zone-specific patterns are structural, not advisory
• Apply field edge patterns exactly as specified
• Apply corner patterns exactly as specified
• Route every deviation through RFI to engineer of record
• Before next inspection cycle
• Documented field fix = protection; undocumented = liabilityThe Four Sources of Field Friction
Friction Source
Impact on Velocity
Prevention Strategy
Cost of Failure
Poor sequencing
Hours of repositioning, backtracking
Five-minute pre-installation planning session daily
2–3x labor cost, schedule delays
Inconsistent lap orientation
Mid-bay corrections, crew confusion
Brief at every crew briefing, mark sheet stack, verify first three sheets
2–3x correction cost, diaphragm discontinuities
Disorganized staging
Crew waits for material, crane waits for clear zone
Stage bundles one step ahead, coordinate crane picks with placement flow
Compounded idle time, reduced daily output
Fastening shortcuts
Inspection failures, rework, liability exposure
Apply zone patterns exactly as specified, route deviations through RFI
Structural deficiencies, warranty disputes, liability
The Five-Minute Pre-Installation Planning Session
Installation Velocity: The Compound Effect
Field-Tested Resources for Construction Professionals
Speed Is About Eliminating the Invisible Waste Between Tasks
The Installation Velocity Principle
What's Your Reaction?