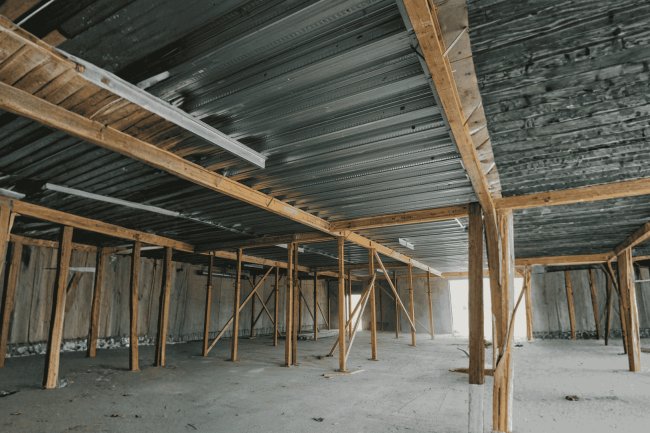
Reviewing Floor Framing Plans Before Composite Deck Detailing
Reviewing Floor Framing Plans Before Composite Deck Detailing
A disciplined pre-detailing review of floor framing plans is one of the highest-leverage steps a detailer or structural engineer can take before a single composite deck sheet is drawn. Errors caught at the plan-review stage cost minutes to fix; errors discovered during fabrication or erection cost thousands of dollars and weeks of schedule. This guide walks through the critical checkpoints — from framing geometry and beam
orientation to loading conditions and boundary constraints — that every composite deck detailer should systematically verify before opening a detailing file.
Composite deck detailing is entirely dependent on the quality of the floor framing information provided by the Engineer of Record. If assumptions are made before the plans are fully reviewed, those assumptions become embedded in shop drawings, fabrication packages, and ultimately the finished structure.
Review First. Detail Second.
Ambiguous Drawings Missing Information Conflicting Callouts
Plan Review
Coordination Filter
Verified Drawings Accurate Shop Details Predictable Installation
How Small Oversights Become Field Problems
Misread Beam Spacing→Incorrect Deck Span Direction
Missed Composite Beam→Omitted Shear Stud Layout
Ignored Edge Detail→Slab Edge & Pour Stop Issues
A Proper Review Creates Alignment
Verify Framing Geometry
Confirm Composite Beam Locations
Resolve Conflicting Callouts
Reduce RFIs & Revision Cycles
REVIEW
Risk Management Principle
Review Is Cheaper Than Revision
A structured pre-detailing review is not administrative overhead—it is a quality-control process that protects the entire project. Teams that validate framing geometry, composite beam requirements, and sheet coordination before detailing consistently produce better shop drawings, experience fewer RFIs, and avoid costly field corrections.
Framing Geometry
Framing Geometry: The Foundation of Every Detail
PLAN
⌖
Geometry must be validated before any loading or composite interpretation begins
Framing geometry errors are the most dangerous class of plan discrepancy because they affect every downstream decision simultaneously. Deck span, beam bearing length, edge conditions, and opening locations all depend on correct bay dimensions and column grid spacing.
01
Column Grid Verification
Confirm the structural grid before trusting the bay
Cross-check the column grid lines shown on the structural framing plan against the architectural floor plan and the structural general notes. Pay particular attention to grids that shift between floors.
Match grid lines
Check floor-to-floor shifts
Dimension partial bays
02
Bay Dimensions and Span
Verify beam spacing against deck span limits
Composite deck span is measured from center to center of supporting beams or joists. Confirm that beam spacing falls within the allowable span range for the specified deck profile and gage.
1½″, 2″, and 3″ profiles
Unshored span limits
Shoring impacts
03
Beam Orientation
Align beam direction with deck flute direction
Composite deck must bear perpendicular to its flutes. Trace every deck panel zone and confirm that the supporting beams are oriented correctly relative to the intended flute direction.
Perpendicular bearing
Flute direction check
Panel layout sketch
04
Bearing Length Adequacy
Confirm minimum bearing at every support
SDI and AISC require minimum bearing lengths for composite deck on steel supports. Standard requirements are typically 1½″ minimum on steel for interior conditions and 3″ minimum at end supports.
Interior bearing
End support bearing
Flange width check
Key Takeaway
Correct framing geometry is the foundation of every detail because all later decisions depend on it. If the grid, span, orientation, or bearing is wrong, the rest of the layout cannot be trusted.
ALIGN
Final Principle
Validate geometry first, then interpret everything else
A plan that is geometrically correct is the only safe base for composite design, bearing checks, and deck layout decisions.
Technical Specification
Composite Beam Designations
Identification & Interpretation
Not every beam on a floor framing plan is composite. Distinction is critical: composite beams require shear studs welded through the deck, affecting placement sequencing, stud spacing, and edge distance requirements.
Schedules & Callouts
Designations typically include a "C" prefix (CB-1) or specific shear stud notes. Discrepancies between plan and schedule must be resolved with the EOR.
Composite Ratios
Partial composite ratios (25%-75%) optimize weight. Confirm if the schedule specifies a ratio, fixed count, or defers to the detailer.
Geometry Limits
Stud placement is constrained by rib geometry. 3" deck systems have strict limits on diameter, height, and lateral cover.
Welding Zones
Through-deck welding is standard, but spandrels or parallel flutes may require deck pull-backs or infill plates for weld quality.
WARN
Critical Warning
Risk of Structural Deficiency
Misidentifying a non-composite beam as composite (or vice versa) produces either wasted material and labor or a structurally deficient floor system. Always resolve discrepancies before detailing.
Composite Deck Plan Review
Edge Conditions, Openings & Boundary Constraints
The Highest-Risk Conditions Usually Occur at the Edges
The field of the deck is often straightforward. The real detailing challenges occur at slab edges, re-entrant corners, shaft openings, roof penetrations, and equipment curbs. These locations introduce interruptions to deck continuity and frequently generate RFIs, revisions, and field corrections when not fully coordinated during plan review.
Composite Deck Boundary Review Map
FRAMED OPENING
STAIR / SHAFT
Re-Entrant Corner
Slab Edge
Critical Review Zones
Slab Edges
Verify pour-stop type, flange compatibility, edge attachment spacing, and continuity requirements at every perimeter condition.
Most composite deck problems originate at interruptions in the slab system—not in the open deck field. By validating slab edges, openings, shaft boundaries, geometry transitions, and equipment interfaces before detailing begins, teams dramatically reduce RFIs, change orders, and installation rework later in the project lifecycle.
Pre-Detailing Review
Building a Pre-Detailing Review Checklist
REVIEW
✓
A pre-detailing checklist turns review into a repeatable project step
The most effective way to institutionalize a thorough framing plan review is to formalize it as a checklist-driven workflow step completed before the detailing file is opened.
01
Geometry Verification
Confirm dimensions, alignments, and tolerances
Column grid confirmed versus architectural. Bay dimensions checked against deck span tables. Beam orientation verified for each deck zone.
Column grid match
Bay span check
Beam orientation
02
Composite Designation Audit
Verify labels and section assignments
All composite beams identified in schedule and on plan. Partial composite ratios noted. Stud geometry compatibility checked for deck profile.
Composite beams marked
Partial ratios noted
Stud compatibility
03
Edge & Opening Survey
Check edges, openings, and interfaces
All pour stop conditions identified and detailed. Openings confirmed with supplemental framing. Re-entrant corners and shaft boundaries fully documented.
Pour stop conditions
Supplemental framing
Shaft boundaries
04
Documentation & RFI Issuance
Record findings and issue clarifications
All unresolved discrepancies logged and submitted to the EOR before detailing begins. Review outcome documented with date and reviewer name in the project file.
RFI log
Reviewer name
Date stamp
Workflow Sequence
Geometry Verification
↓
Composite Designation Audit
↓
Edge & Opening Survey
↓
Documentation & RFI Issuance
What to Do with Discrepancies
Every discrepancy identified during the review should be logged as a formal RFI or plan clarification request. Do not make assumptions and proceed; incorrect assumptions create revision cycles that are far more expensive than issuing a clean RFI at the start.
BIM
Final Principle
A documented pre-detailing review is both workflow discipline and liability protection
A completed, documented pre-detailing review demonstrates due diligence before proceeding and provides a critical record if a field discrepancy or post-construction dispute ever arises.