Load Distribution Techniques in Wood Nailer Joist Systems
A deep dive into structural best practices for engineers, contractors, and construction professionals working with wood framing systems.

Introduction: Why Load Distribution Matters
In structural engineering, how a load travels through a system is just as important as the load itself. Wood nailer joist systems rely on carefully engineered load paths to ensure stability, durability, and code compliance.
Poor load distribution can lead to deflection, noise, and even structural failure — making this concept critical across every stage of a project lifecycle.
Understanding load distribution techniques is essential for all professionals involved in construction — from design and coordination to execution and management.
Design Engineers
Specify correct member sizes and connection details for efficient and compliant load paths.
General Contractors
Execute framing accurately and resolve field conflicts before they escalate.
Project Managers
Track framing milestones, sequencing, and coordination risks.
BIM/CAD Teams
Model joist systems precisely for clash detection and shop drawing accuracy.
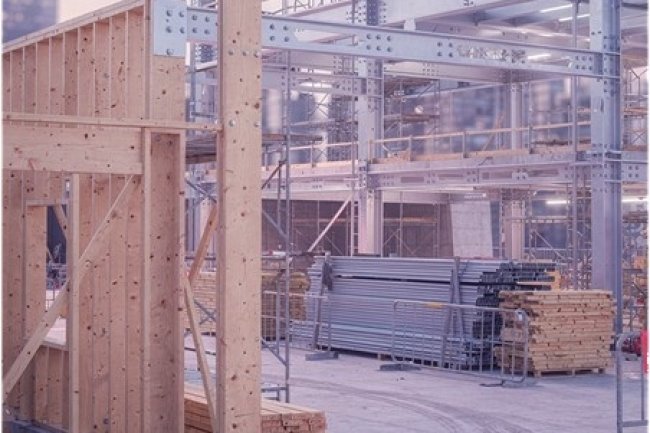
What Is a Wood Nailer Joist System?
A wood nailer joist system combines dimensional lumber with structural steel to create a hybrid framing solution. Wood nailers — typically bolted or welded to steel beams — provide a secure fastening surface for joists, decking, and other framing elements.
This approach is widely used in mid-rise construction, industrial facilities, and renovation projects where wood framing must integrate with existing steel structures.
Primary Components
- Steel beams or girders (primary structure)
- Wood nailer plates (bolted to steel)
- Wood joists or engineered I-joists
- Blocking and bridging members
- Sheathing or decking material
Common Applications
- Mixed steel-and-wood commercial buildings
- Roof framing on masonry or steel structures
- Mezzanine floors in industrial facilities
- Renovation and adaptive reuse projects
- Platform framing over steel podium levels
Understanding Load Types in Joist Systems
Different load types act on joist systems in unique ways. Proper design requires understanding how each load behaves and how it transfers through the structure.
Dead Loads
Permanent structural weight including joists, sheathing, finishes, and MEP systems. These loads are constant and form the baseline for structural design.
Live Loads
Variable loads from occupancy — people, furniture, and equipment. Governed by codes like IBC and ASCE 7 based on building use.
Lateral & Environmental Loads
Wind, seismic, and snow loads introduce lateral and uplift forces requiring strong connections, bracing, and diaphragm continuity.
Dynamic & Concentrated Loads
Point loads and vibration from equipment require load redistribution through beams, headers, or reinforced joists to prevent localized failure.
Effective joist design depends on understanding how different loads interact and transfer through the system.
Technique 1 — Tributary Area and Joist Spacing
Tributary area analysis defines how load is distributed across joists. Each joist carries load from a portion of the floor or roof — typically half the distance to adjacent members.
As spacing increases, tributary area grows — increasing the load demand on each joist and influencing sizing, deflection, and performance.
Spacing Considerations
- Standard spacing: 12", 16", or 24" on center
- Closer spacing = smaller tributary load per joist
- Wider spacing = fewer members, higher load demand
- Engineered I-joists allow longer spans at wider spacing
Design Best Practices
- Align spacing with sheathing modules (24" / 48")
- Verify deflection limits (L/360 floors, L/240 roofs)
- Increase joist depth before reducing spacing
- Use span tables only as a preliminary guide
Load Behavior Insight
Larger tributary areas increase bending and deflection demands. Proper spacing balances efficiency with structural performance and serviceability.
Critical Zones
Near partitions, point loads, or equipment zones, tributary areas must be reassessed. Reinforcement such as doubled joists, rim boards, or blocking may be required.
Technique 2 — Blocking and Bridging for Lateral Stability
Joists are strong in bending but weak laterally. Without restraint, they can rotate or buckle under load — a failure mode known as lateral-torsional buckling.
Blocking and bridging tie joists together, improving load sharing, reducing deflection differences, and stabilizing the system during and after construction.
Solid Blocking
Full-depth lumber installed between joists at mid-span or supports. Provides maximum rigidity, prevents rollover, and transfers lateral loads into the diaphragm.
Cross Bridging
Diagonal X-pattern bracing between joists. Distributes loads and reduces differential deflection, offering a lighter and faster alternative to solid blocking.
Rim Boards & Rim Joists
Perimeter members that cap joist ends, prevent rotation, and transfer loads into supporting structure. In nailer systems, the wood nailer often acts as the rim at steel interfaces.
Strongback Blocking
Continuous member installed perpendicular to joists at mid-depth. Reduces vibration and enhances stiffness in long-span systems beyond standard design expectations.
Technique 3 — Doubled and Sister Joists for Concentrated Loads
Standard joist sizing assumes uniform loads, but real structures include concentrated loads such as walls, equipment, and point supports.
Doubling or sistering joists is a practical method to increase load capacity and reinforce critical zones where additional strength is required.
When to Double Joists
- Below partition walls parallel to joists
- Under posts, beams, or columns
- At floor openings (headers & trimmers)
Reinforcement & Repair Cases
- Joists damaged, notched, or over-drilled
- Heavy fixtures (bathtubs, HVAC, tanks)
- Strengthening existing deflected joists
Composite Action Principle
Sistered joists must act together as one structural member. Proper fastening ensures load sharing and prevents independent movement.
Fastening Requirements
Use structural screws or 16d nails at 12" on center in staggered rows. Apply construction adhesive to improve bonding and reduce floor squeaks.
Technique 4 — The Wood Nailer-to-Steel Interface
This connection defines the transition between flexible wood framing and rigid steel structure — making it one of the most critical load transfer points in the system.
Improper detailing can lead to eccentric loading, movement issues, or uplift failure — often hidden until structural performance is compromised.
Select the Right Nailer Lumber
Use minimum No. 2 Douglas Fir or Southern Yellow Pine. Ensure lumber is straight, dry, and free of defects at bolt locations. Match nailer width to steel flange with proper edge distances.
Specify Correct Bolt Pattern
Use 1/2" or 5/8" diameter bolts or approved fasteners at 24"–48" spacing. Ensure spacing transfers vertical and lateral loads without splitting the wood.
Address Differential Movement
Steel and wood expand and deflect differently. Slotted holes allow controlled movement, reducing stress buildup and preventing fastener loosening over time.
Coordinate with Fire Protection
Ensure the nailer and its connection comply with fire-rated assembly requirements. Verify UL listings, fasteners, and any required fire protection coatings or encapsulation.
Deflection Control: The Silent Performance Metric
Structural safety does not guarantee performance. Excessive deflection leads to cracked finishes, uneven floors, and occupant discomfort — even when strength criteria are satisfied.
Code-Prescribed Deflection Limits
L/360
Live load limit for floors
L/240
Total load for floors & roofs
L/180
Roof live load limit
L/600
Tile & stone finishes
Practical Strategies to Reduce Deflection
Increase Joist Depth
Most effective and economical way to improve stiffness.
Reduce Span
Add beams or bearing walls to shorten joist span.
Use Engineered Wood
LVL/PSL products provide higher stiffness and consistency.
Strongback Bridging
Improves load sharing between adjacent joists.
Composite Action
Glue sheathing to joists for improved stiffness.
Beam Cambering
Pre-camber beams to offset dead load deflection.
Deflection often governs design — controlling it early prevents costly serviceability failures later.
Key Takeaways for Your Next Project
Wood nailer joist systems offer an elegant solution for hybrid construction—combining the workability of lumber with the strength and span capability of steel primary framing. But their performance depends entirely on how thoughtfully load distribution is designed, detailed, and executed in the field. Here’s what to carry forward from this discussion:
Define the Load Path Early
Establish tributary areas, load types, and critical connections during schematic design—not during shop drawing review. Early clarity prevents expensive late-stage changes.
Control Deflection, Not Just Stress
Design for serviceability, not just structural adequacy. Deflection governs finish performance and occupant satisfaction. Use engineered products and bridging strategies to keep long-span systems stiff and responsive.
Detail the Nailer Connection with Rigor
The wood-to-steel interface is where most failures originate. Invest in a thorough connection detail that addresses vertical loads, lateral forces, differential movement, and fire rating requirements simultaneously.
Use BIM to Protect the Structural Design
A fully coordinated 3D model ensures that MEP trades, architectural finishes, and framing systems coexist without compromising load paths. Clash detection is an investment that pays dividends at every project phase.
Conclusion: Engineering That Goes Beyond the Numbers
Load distribution in wood nailer joist systems blends structural theory with real-world execution. From tributary areas and load paths to nailer-to-steel connections, every detail contributes to system performance, durability, and code compliance.
By combining precise engineering calculations with coordinated BIM workflows and clear detailing practices, project teams can ensure that wood-framed systems perform reliably — not just on paper, but throughout the building’s lifecycle.
Design with Precision
Define member sizes, spacing, and connections based on actual load calculations — not assumptions.
Coordinate Across Disciplines
Use BIM to align structural, architectural, and MEP systems before construction begins.
Build with Confidence
Well-engineered load paths ensure long-term performance, safety, and structural reliability.
Strong structures are built on clear load paths, coordinated design, and disciplined execution.
What's Your Reaction?